Thermochromic Clock
- Dr. Tõnis

- Apr 11, 2022
- 2 min read
Description
After seeing a project where a thermochromic foil was used I wanted to build something similar. A clock seemed to be the most logical thing to build.
Project summary
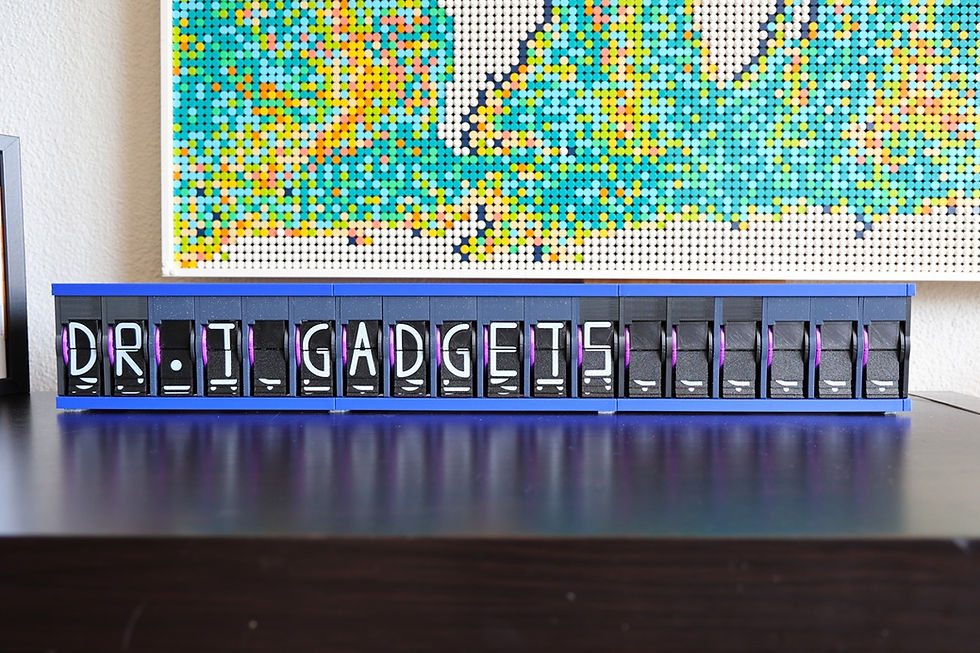
In this project I designed a clock that utilises thermochromic pigment. The dials were arranged as a simple seven segment clock.
My responsibilities
Design the control and heater PCB
Solder the missing components on the PCBs
Find the suitable pigment to use
Design and construct the 3d printed frame for the PCBs
Programming the ESP controller
Results
The thermochromic paint requires a defined temperature to change the colour. I choose a pigment that should change colour around 30 degrees. That is higher than usual ambient temperature and at the same time not too high. I decided to use a black pigment that I could mix with nail polish. Both are simple to obtain and easy to use. The dials I designed with aluminium PCBs. They provide better and more uniform heat distribution. The panel to connect the dials is a simple array with shift registers that turn power ON and OFF.
After the design phase the implementation started. Mixing the pigment to the nail polish was not as straightforward as expected. Applying the polist to the PCB uniformly was again nigger chalenge than antisipated.
To sum up, the technology and idea works. However, few design flaws made the project result not as versatile as hoped. The dial PCBs I ordered were 1.6mm thick and that was too much metal - one requires a lot of heat to heat them up and it takes a long time to cool down. Thus, I could change the time only after every 2 minutes and not every minute as I was planning. In the end the idea works, nevertheless few improvements should be applied for a better experience.
The Clock in action: Link
The Inspiration Project can be found here: Link


Comments